Knowledge is power, and if you’re new to survival, preparedness knowledge equals life. We’ll walk you through the best survival strategies and introduce you to the top-notch gear and vehicles that will be of great use during emergency preparedness. You’ll understand the difference between a prepper bug out bag and a casual backpack, learn what skills are crucial during the hurricane, flood, or earthquake, discover how to store and filter drinking water and extend the life shelf of your food. Stay with us!
Into Preparedness
How do you feel about being prepared for whatever happens? I mean, we live in an unstable world today, and any sort of catastrophe can accidentally begin. I am not exaggerating now, maybe even downplaying it a little bit.
The simplest example is the situation with riots and civil unrest. When people want to make a political statement, they go out in the streets, and the uncontrolled violent “carnival” begins. You are lucky if you manage to escape this disaster outside your house. But being inside the house still does not mean you are protected. Your house can accidentally get under rioters’ attack, or the way out of it might be blocked, and you will have to stay inside for days. If you are not prepared, hardly will you easily overcome this “unpleasant obstacle.”
Or, let’s consider a terrifying example. The threat of nuclear attack is also real, and if it occurs, the majority of us won’t be able to survive it. But those who practiced their survival skills and obtained correct knowledge will.
In cases of these catastrophes, you can’t rely on the government or other special forces, only on yourself. That is why you have to improve your self-reliance as much as you can.
I did not mean to scare you, and I just want to make you think of your future in a more serious way. Please, think of a straightforward thing now: in case of emergency, will you be able to protect yourself and your family?
If your answer is “yes,” I’m happy to hear it. This probably means that you are a true prepper. However, if your answer is “no,”—don’t feel nervous. Luckily, you ran into this article, which will introduce you to some basics of survival.
I am interested in the increase in the number of people, certain about their self-reliance and self-defense skills. Now, if you relate (or want to relate) to this category of people, you might have a question: where should I start?
To the Prepper
I am here to help you answer this question. My purpose is to let you feel more comfortable with all these “survival issues.” I would like to give you some information about protecting your family and your home, collecting and storing the survival kit supplies, how to act in case of a disaster, and how to develop your emergency preparedness skills.
To do this, I created a Step-By-Step Preparation Guide, which will serve as a foundation of your future “Preparedness Home.” Neither you will have to search for it on the Internet nor check every book connected with survival. It’s all here. Follow this relatively simple plan to feel like a true prepper.
Below I provide a useful video, which covers 10 Preparation Steps in detail. If you are more “a listener” or “a viewer,” rather than “a reader,” take a closer look at it. Here it is:
Step 1: Food With A Long Shelf-Life

My personal advice is to prepare supplies for two weeks. This might sound strange because serious disasters hardly end in such a short time period, so, probably you should prepare more? Well, of course, you can, but, firstly, you should start with something small and simple. You probably won’t be able to. I don’t know, order a truck with the food at a time. It will be quite expensive and will require a lot of space. Secondly, this amount will be just enough to survive some short-term emergencies, like the riots, which I already mentioned.
The foods you will be preparing must obtain a certain amount of calories. But how many calories (in total) should you supply? I created an easy-to-use table, which will help you perform all necessary calculations:

Firstly, consider all your family members: their amount, gender, and age of each person.
Then, for each family member, calculate a required day supply: follow the “gender+age” vertical category and an activity level horizontal category. Choose the numbers which fit.
After that, for each member, multiply this number by 14 (7+7 days on each week)
In the end, sum up all the resulted numbers.
This final number is the approximate required amount of calories for your family.
Now, when you know how much food your family needs to survive a short-term disaster, you have two ways to get this food: either buy a DFY (done for you) or make DIY (do it yourself).
Let’s start with a simpler option.
DFY Emergency Storage
I, personally, have two favorites in the long storage food manufacturers. These are Legacy Food Storage and Valley Food Storage.
Their foods can survive a 20+ years long shelf-life if stored properly, and the package is not damaged.
Also, check the list of 25+ year canned meats to be added to your food supplies.
But if you think that the DIY way is closer to you, let me tell you about it as well.
DIY Emergency Planning
I have to warn you—the DIY way is neither quick nor simple. It means you have to be ready for some obstacles on this path.
For sure, you will need cereals and legumes, rice and beans, so that your food was tasty enough. Tasteless food with a bad flavor is almost as bad as no food.
Read about making hardtack and pemmican (for meat) as well.
Another possible way to consider is obtaining a vacuum sealer. A vacuum sealer is a machine that removes the air from the packing, thus creating a vacuum inside and then seals the pack so that the air could not get back. A vacuum is a required circumstance if you want to keep your food fresh for years—if there is no air inside the pack, the bacteria cannot live there. Thus the food cannot be spoiled easily.
A vacuum sealer is a relatively cheap option (compared to other technologies that prolong the shelf life of the products). You can spend about 200$ and get your personal machine. They are also pretty compact, which means that you won’t have to look for additional space in the kitchen.
A more advanced way of preparing meals for the stockpiling is freeze-drying. A freeze-dryer is a machine that freezes the foods without freeze burning them by removing extra liquids inside. Freeze-dried foods can stay eatable for approximately 30 years!
But, a freeze dryer is an expensive machine. The simplest examples cost about 2000 dollars (but they are minimal for that price). The bigger machine you want—the more money you will have to spend on this device. That is why unless you are planning to open your own small freeze-drying manufacture, you should probably pay attention to the cheaper and simpler machines.
For better or for worse, this making DIY supplies is both a time-consuming and energy-consuming activity. And yet, many individuals prefer this path.
No matter which way of getting the food you choose, the key idea is that you have to put some effort, spend time and money into creating a basic two weeks food supply. If you take it seriously, please, do it as soon as possible. You never know when the emergency hits you, but you have to have survival supplies to increase preparedness.
When you are done with the meals, you can pay attention to other important survival steps. But the food and the water come first.
Now let’s move to the next, quite obvious, preparedness step—the cooking itself.

Step 2: Cooking Food
Let’s imagine the disaster that occurred. No electricity, no gas. But you have to prepare your food somehow. What is the point of having a two-week supply if you cannot eat what you prepared?
The key thing here is the water that you need to boil somehow (by the way, the water supplies is the thing which we will discuss in the next “chapter”).
The obvious options are stoves (backpacking, for instance) and ovens (like solar ones). Or, you can start a fire in the backyard, but hardly will it be as efficient as you would like it to be.
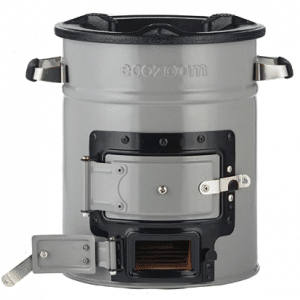
You can buy it in the specialized shop you create with your hands!
Use wood to boil the water. Smaller sticks will also fit.
These rocket stoves are the option for those keen survivalists who don’t want to spend much fuel but want to get as much heat as possible.
The next obvious step is to get the fuel, which will be enough to cook for you and your family members for at least two weeks. This is the required minimum to obtain. Hardly will you have a chance to leave your house trying to get some additional fuel in case of emergency.
You can also try to use the rocket stove in case of a winter power outage to heat the building from the inside. Be careful because the smoldering wood inside may start a fire and destroy the building. There is also a chance of getting intoxicated by the smoke—your body does not want this. But, just in case, a rocket stove is capable of protecting your limbs from frostbite.
Pay attention to this article, devoted to the rocket stoves. There you can find everything you need, from the most reliable brands to affordable prices.
Step 3: A Water Stockpile
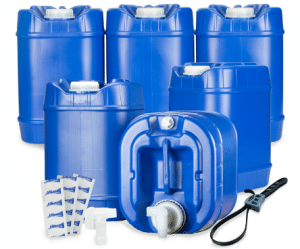
Your water supply should at first follow exactly the same rule, just like the food. Prepare enough liquid for 2 weeks at least. This amount will be easy-to-get, and it won’t cost like your kidney. In other words, this amount is perfectly optimized.
Considering water, please, be serious. A person can survive weeks without food (yes, these weeks will be horrible, but survivable). But, people don’t have these weeks when it comes to liquids. So, probably, you should even start your “preparedness journey” with water supplies first and then move to the food.
How much water should you get? At least 1 gallon per day per 1 family member (consider it my recommendation concerning water day supply). 1 gallon is slightly more than 3.5 liters, which might sound a little bit “too much.” But as a survivalist with some experience, I state that you should better have slightly more survival supplies than slightly less than you need.
One more reason why having more water is beneficial is that you need it for cooking and to accompany your hygiene items.
Where can you fulfill your liquid supplies? The simplest solution is to go to the grocery shop and buy enough bottled water. But this is not the best option, of course.
If the means allow, you should better check Legacy Storage’s water containers. This article will show you which steps I performed to create my personal water supply.
This post is devoted to the common mistakes in water storage. It will be handy for the newcomers in survival.
Step 4: Medical Supplies & Basic Medical Preparedness
I hope no one will doubt the importance of having a first aid kit at home. But having pills and other contents if suck kit is not enough—you have to know what exactly you are planning to do about it.
In case of emergency, most likely, neither will you manage to get a consultation from your family doctor nor receive urgent care.
When disasters happen, the hospital wards are often filled with injured/sick/ill people. The closest example is the Coronavirus pandemic—not every person could receive full medical care because of hospitals’ unpreparedness. That is why you have to be prepared for any sort of disruptions.
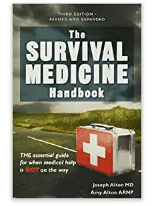
Anyway, if the disaster catches you off guard, no insurance policies will help you. Increase your emergency preparedness by reading the book devoted to survival medicine.
The simplest step for you will be to invest in the Survival Medicine Handbook and to obtain a MyMedic First Aid Kit. I managed to deal with these products, so I can be sure about their quality.
There is a wide variety of MyMedic Kits. Choose any that you like!

These two basic medical items—a book and a first aid kit—will increase your emergency preparedness. That is why every home should have them.
This article is devoted to creating a personal survival medical kit for those who want to have an individual set of medical items and prefer a DIY way.

Step 5: “Last Resort” Warmth Gear
The next highly important tool to obtain in case of a world collapse is something that will provide you with warmth. Of course, if you live in a place where the temperatures don’t go down drastically, this might not be much of your matter of concern. And yet, I would recommend thinking about “plan-B,” just in case.
It might happen that electricity and gas are inaccessible, the temperature outside the home is low, and you have to warm up you and your children somehow. A nice and smart decision will be investing in TACT Bivvy’s.
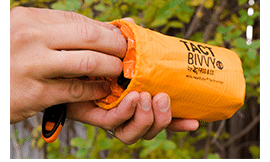
The concept of work of these little helpers go as follows:
They remind us of ordinary sleeping bags, but with a “super-power”: TACT Bivvy’s can trap the body heat and “seal” or “clog it up” inside, thus keeping you in warmth for hours. It is designed from Mylar (you probably heard of Mylar bags). This material is also used to help spacemen keep the heat when the temperatures are extremely low.
Another reason to pay attention to these sleeping bags is that they are lightweight and compact. You won’t need to look for free spaces to keep them all—these items are rather small!
Step 6: Create Personal Bug Out Bag
In the majority of emergency cases, when you have to demonstrate all your emergency preparedness, it mainly comes to staying at home. Your house is probably the safest place when any human-caused events, like terrorism, happen.
Your home serves as a castle that protects you and your children from individuals trying to destroy the world around you. This is when the best decision is to barricade yourself in the building. If you have enough survival supplies and your overall survival skills are well-developed, you don’t have to worry too much. Any kind of emergency is bad, but sometimes people overestimate the event and start to panic when it’s inappropriate and undesirable.
My recommendation is—if you prepared survival kit supplies, if your survival knowledge is fine, and if the level of self-reliance is appropriate, you can exhale and calm down.
But human beings are not the only reasons for the possible collapse. Nature can play tricks as well.
When such disasters as floods or fires happen, staying at home is not safe! These disruptions will probably destroy your houses, and if you are inside, you will get damaged as well!
The smartest decision, in this case, is to leave your place of living. When doing so, you will have to take something from the apartment—you cannot go just like that. But will you have much time thinking of what should be taken and should not?
When emergencies occur, people tend to get lost and confused. Most likely, they take a cell phone (nowadays we almost cannot live without them), some important documents, like passport, insurance policies, or birth certificates, and here the list ends. A person gets stuck and… What else?
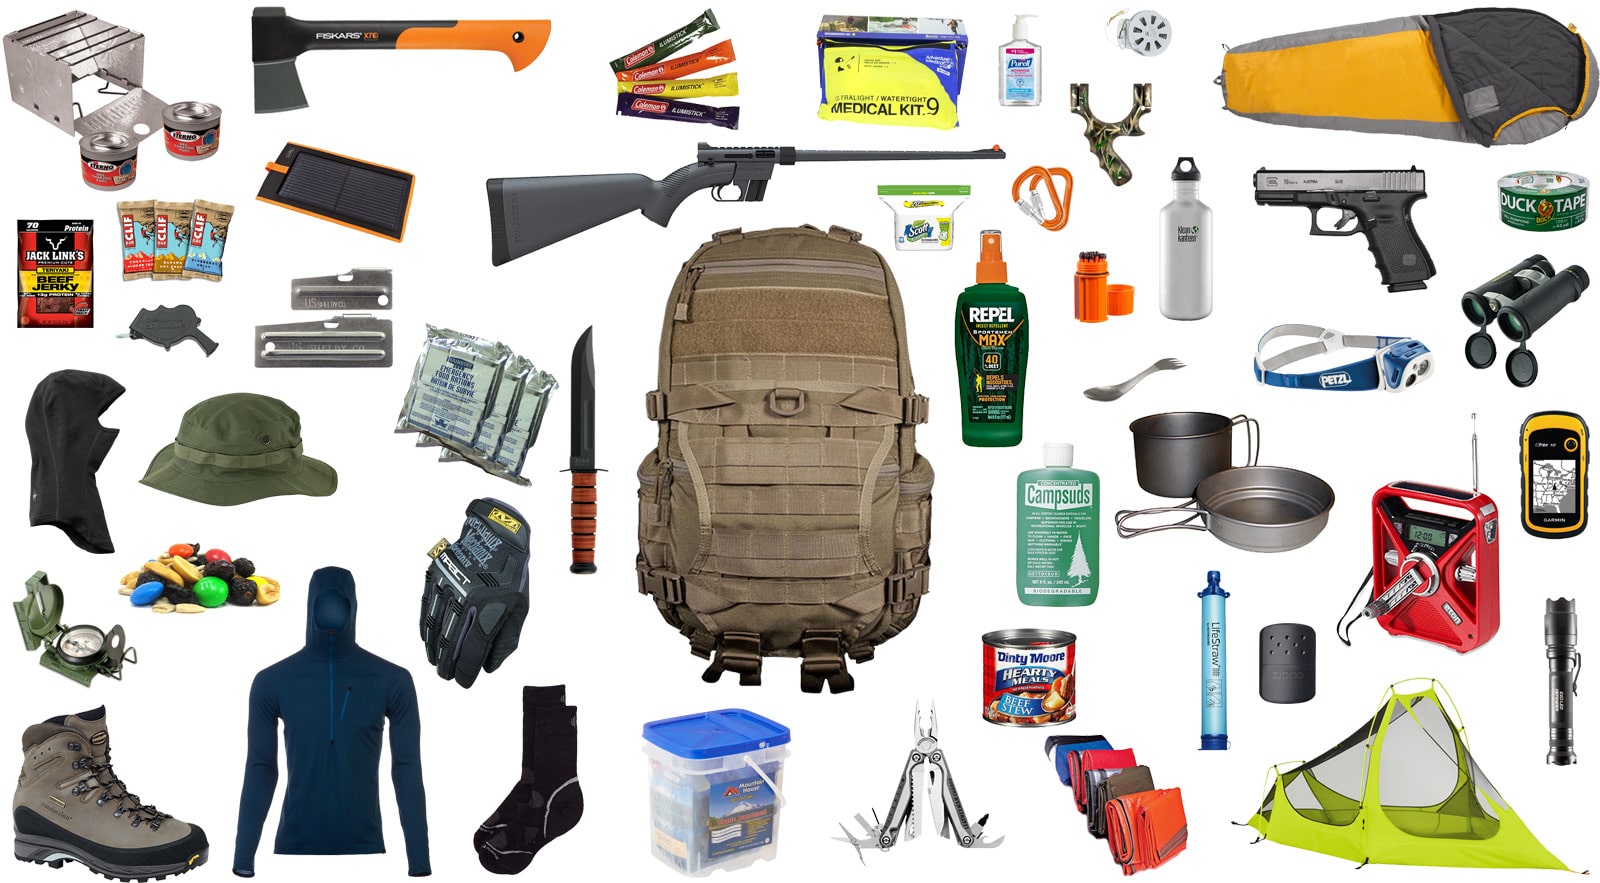
For these cases specifically, the survival bug-out bags were created. They usually include some basic things, like necessary medications, some hygiene items, maybe even duct tape, anything that will be helpful outside in unstable times.
It has to be well-packed and “ready-to-be-taken” because you will have minutes to leave the house, not hours or, even more so, days.
Don’t rely on the car. You will probably want to drive somewhere far from the catastrophe, but you won’t always be able to do it. Get ready to walk some distances. That is why your bug-out bag must not be too heavy and unmanageable. These kits are usually rather compact and comfortable to carry.
You can always DIY your survival kit. In this article, you can read more about which items should be put inside any of the survival kits. But not every tool provided in this list you should put in one bag—you won’t be able to carry it then.
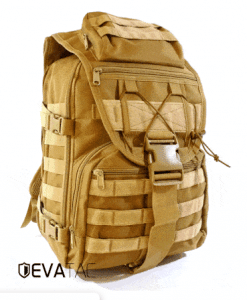
But if you are not sure, you can always obtain a DFY bug-out bag. My advice is an EVATAC Combat bag.
It is created from high-quality material, it contains a lot of necessary tools, and it is the best solution for any emergency event.
I use it, and it helps me feel that my emergency preparedness is fine.
Step 7: Emergency Self-Defense
Personal defense plays an important role in the general understanding of emergency preparedness. When you understand that you can protect yourself from anyone and anything, none of the disruptions seem to be a huge problem.
Everybody has one’s own perception of what is required to guarantee minimum protection. But since I am now referring mainly to the beginning survivalists, I will provide some basic issues connected to the home-defense and self-protection.
Personal Defense Exercises
Of course, you will benefit from having a kit full of different classes of weapon, or at least reading a book on some fighting techniques (reading and practicing are, for sure, of different level of protection, but I cannot insist on hiring a trainer and exercising in martial arts—this is for advanced preppers)
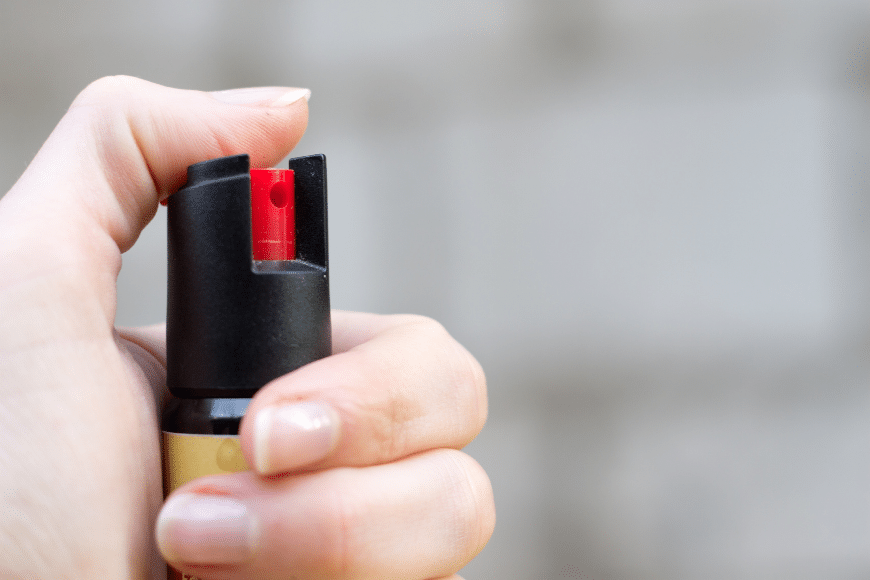
You can increase your self-reliance just by getting some simple protection supplies. A wonderful tool that I personally recommend is pepper spray.
These devices are well-accepted and often used in a so-called “survival community.” Pepper sprays are universal favorites on the list of possible protection measures.
This tool is easy-to-use (but, anyway, the instruction is always provided) and is not lethal—hardly will you kill anyone using pepper spray. Also, the tool is compact, so that you could carry one in the bag or even in the pocket.
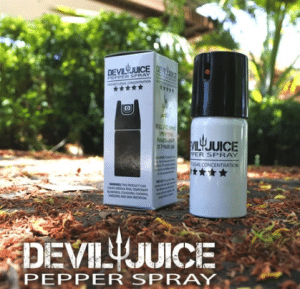
“Devil Juice” is my personal priority. It is not very expensive and has a heat strength of 3 million SHU (which is enough to neutralize your enemy). It will even be enough to fight several opponents. I carry this guy right in my bag, between a cell phone and hand sanitizer.
Home-Defense
This issue is a little bit more complicated. Firstly, we all live in different places, and we all have different possibilities. The options are usually very different for homeowners and renters, the latter having fewer opportunities to provide more complex home protection.
Anyway, you can (and should!) try to do some basic issues to make sure that you and your relatives are protected.
Let us now discuss several general alternatives concerning home-defense, accepted by the majority of survival community members:
Deadbolts have more advantages than they might seem to have. If you combine them with the door reinforcement kits, you can be sure that even a battering ram won’t break into your home. People conducted a sort of experiment—watch this video and see for yourself.
If you are a renter, you probably don’t have deadbolts when you move in. Landlords don’t usually think carefully about adding some extra-measures to provide safety. However, you can always ask your landlord to install deadbolts. I am sure none of them will refuse, especially if you create an official document with the phrase “I am concerned about my safety” or “I want to ensure my safety.”
Installing this tool is not an expensive procedure, so your landlord will probably agree to this measure.
At this point, regardless of whether you have deadbolts or not, you have to pay attention to these guys.
The majority of doorstop and jammer bars have an integrated alarm trigger. This means that you will provide an additional level of protection and have a chance to hear that something is wrong and take some actions.
As for the homeowners, you have more alternatives to protect yourself from any undesirable event. The best measure to increase your emergency preparedness will be to implement some basic alarm system (since I assume that you already have deadbolts).
I am not asking you to spend much money on an expensive system—start with a basic option, like by Abode (check starter kit here). I am quite satisfied with the service they provide.
Some of my friends use Ring Security System with the Ring Video Doorbell. The feedback their provided on that was positive.
An additional recommendation will be to implement motion-sensing lighting next to each of the entrances. This is the perfect way to increase your survival chances, especially if you put it in a way so that it could cover some unexpected and usually invisible entrances.
What especially matters about this lighting is that sometimes an intruder can just come closer and turn it off by twisting the bulb off. Yes, it might sound silly, but it is indeed a problem. That’s why you should pay attention to these ones with integrated LEDs. I personally use these guys, and they work fine. Or, just try to make sure the bulbs are high enough so that nobody could simply twist them off.
The key idea of these practices is to make it almost impossible for the outsider to get into your house. If you don’t display enough self-consciousness and self-reliance, anyone will be able to break in.
So, to sum it up, the basics of self-and home-protection for the homeowners are to defend the doors, install some alarm system and use motion-detecting lights.
In this article, you can get additional information devoted to door reinforcement.
Step 8: Hand Crank Emergency Radio
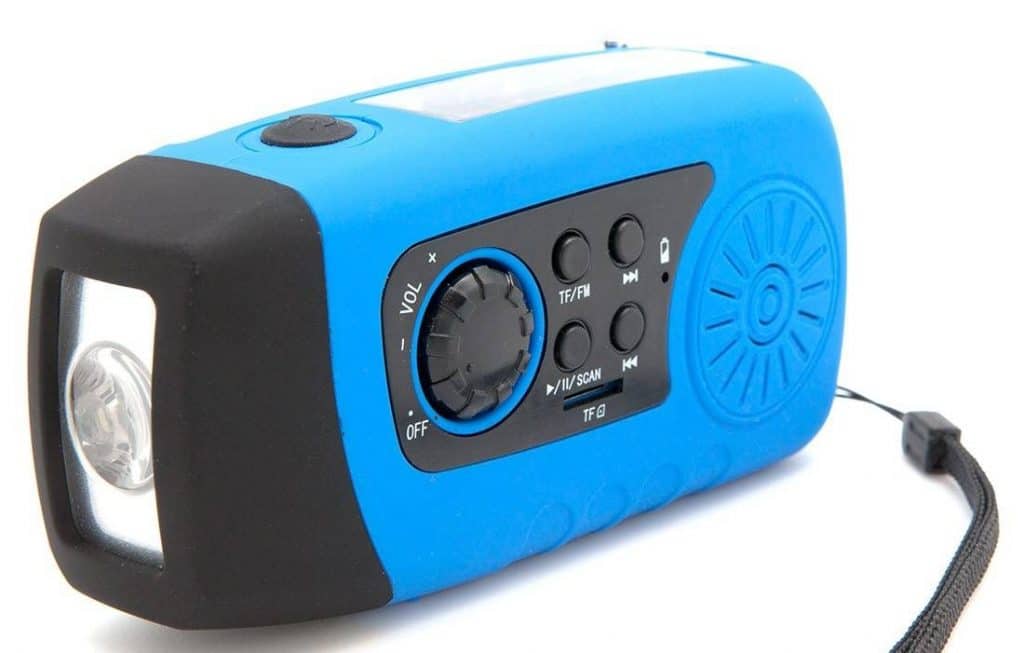
This emergency preparedness step is simple—get a hand-crank radio.
Now you are probably confused by the idea itself and are asking a question, “what for?” Think of a potential catastrophe—the electricity might be over. What will you do? No TV, no Computers, only half of the battery on your cell phone. How will you find out what is going on outside?
A Hand Crank radio is a universal way to get some important information about what is happening outside (remember, leaving the house is dangerous). It will help you answer the questions concerning such issues as:
- whether it is safe enough outside or not
- whether there are any points where you can refill your water supplies
- whether the natural disaster is going to last long (according to the forecast)
- and many more
This kind of radio has an integrated generator, which will allow you to stay connected to the outer world.
My personal choice is the Scorpion II Multi-Powered Weather Radio & Flashlight by Eton. However, I do not insist—choose whatever you like and trust, be it a NOAA weather radio or a HAM radio.
Some recent developments allowed you to create models with the help of which you can even charge your phone.
Such a radio has to be added to your prepping gear on a par with duct tape or any other helpful tool.
From this article, you can learn more about the best hand crank radios I ever had to deal with.
Step 9: Emergency Gas Mask & Filter
At this point, you might think that this step is more for the advanced preppers. I am here to prove you wrong.
Your household has to invest in this helpful tool because the number of cases you might hypothetically need is quite high.
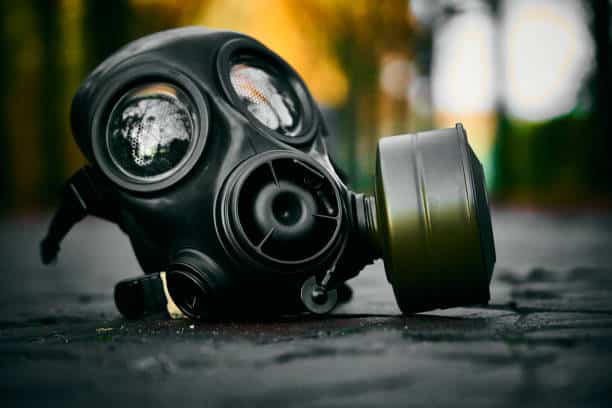
These masks (with filters) are used to protect the bodies from intoxication. If your household does not have at least one, that’s too bad.
Let me give you a couple of examples.
In case of a nuclear attack, you will have to face the fallout. It will destroy your body in several months if you don’t have a protection tool.
When the times of riots come, the streets are usually filled with tear gas. You cannot go outside without a mask in such cases.
Chemical attacks can kill you in hours if you are not equipped with these devices.
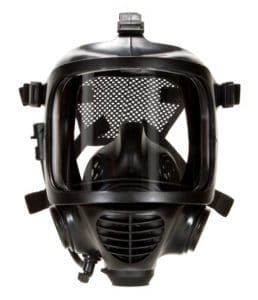
And, finally, we now live in the pandemic world. These masks are capable of protecting you from viruses. If you or any of your relatives have a tendency to the lung diseases, these are irreplaceable tools. They will change your perception of any catastrophe.
I recommend having at least one gas mask for a household. (with at least two filters). If you can afford to buy more, this will be perfect, but if you cannot, one will be fine. Usually, if a household needs to fulfill the supplies, only one member goes out. In this case, he/she will need this gas mask.
After long and painstaking research, I found two manufacturers who produce high-quality trustable gas masks. These are:
MIRA SAFETY GAS MASKS

PARCIL DISTRIBUTION RESPIRATORS
A couple of my friends have the products of these brands and are satisfied with their quality. And I tend to trust my friends!
Notice: each mask requires at least two filters on it!
This article provides more detailed information on various gas masks, their producers, and some additional points about them.
Step 10: Read, Learn, Practice, Enter The Resilience Community
Here we are—at the end of this small “baby” journey of some basics on increasing self-reliance and developing emergency preparedness. I am so proud of you!
If you followed my pieces of advice, read this article carefully, and took care of your survival supplies, you are most likely ready to survive any of the potential disasters, starting from riots and ending with some local natural “surprises.
But your preparedness at this point concerns only slight shake-ups. These steps are still not enough to survive some more profound, more dangerous, more long-lasting events.
This means that if you really want to join the ranks of true preppers, you have to keep moving in this direction, becoming more and more advanced. This is exactly what it means to live a resilient life!
Good news—after all these steps, you are ready to continue your journey, the journey of resilient life.
Living a resilient life means creating a strong basis under your legs to make sure you will overcome obstacles from any life sphere.
For instance,
- Set up a small business to protect yourself from unexpected reductions.
- Start collecting rainwater to become more independent of the local water delivery system.
- Get a backyard garden that will provide you with some of the necessary products, like fruits and vegetables.
- Decrease the debts to be more resistant towards financial crises.
These examples are the simplest decisions of those which you will learn to make after joining the “resilient club.”
This lifestyle will not only protect you from potential baffles but also will let you feel some sort of stability: both emotional and material, and less stress.
I know for sure that the lifestyle the majority of people lead nowadays is not a reliable or stable one. People tend not to think about potential threats this world has prepared for us. But, actually, happy life is a stable one. So if you want to avoid psychological problems, The Resilient Life’s doors are always open.
I have been living this kind of life—a resilient life—for years now. That is why I can state for sure that if I did not, I would experience more troubles and stressful situations than I do now.
If you are interested in a stable present and future, here you can learn more about how to become a part of a “resilient movement.”
FAQ
What are the top 10 survival items?
Survival items plus food and water are the issues with which you can fill your survival kit supplies with. A person cannot live more than 3 days without liquids, so this is probably the most important “survival item,” so to say. However, if we talk about tools, the most helpful and useful are sleeping bags (which can ensure warmth), a hand-crank radio (many people choose an NOAA weather radio), a stove (or some alternative cooking method). Do not forget about medications. These things have to be present in your supplies.
How do you prepare for a survival situation?
To be prepared for an emergency, you have to check your survival kit supplies so that they were well-complected and could guarantee at least primary survival. Make sure you have enough meals and liquids to feed each member of your household. Get some basic tools, like a sleeping bag, a hand-crank radio, a gas mask, some basic medications. What also matters—increase your knowledge about possible disasters and how to act when they happen.
What are the best things to stockpile?
In order to survive a disastrous event, you have to be prepared for it. This can be achieved by making some emergency supplies. Pay attention to the meals. Stock those foods which can survive a long-lasting shelf-life (canned or vacuum-sealed foods might work). Don’t forget about liquids—a person cannot live longer than 3 days without them. These are the obvious things. You should also equip yourself with such tools as a gas mask, a sleeping bag, a hand crank radio to stay in touch, some necessary medications.
How To Disappear (As Much As Possible) and Deal With the Consequences?
If you want to stop leaving a trace behind, you might want to disappear at some point. To do so, you have to have some savings, desirably more than 50 thousand dollars, to provide everything you will need. Deal with the officials, like your credits, so that banks stopped to look for you. Your phone and laptop might also leave a trace—you will have to amend a sim card. Try to get a passport from another country to leave the birthplace. Be ready—the disappearing process is hard.

