Flintknapping is something our ancestors have mastered before metal. It is not just about arrowheads as inexperienced knappers may think. It is a prehistoric way of creating stone, bone, or wood tools that is always useful in the wilderness. Learn about a hammerstone, antler, and other tools for percussion flaking, a rough method that produces really large flakes, and about different materials, such as chert and obsidian. Read about pressure flaking that allows making a more precise shape and choose how you what to knap!
Intro

The beginner in survival practices might wonder—why do people even care about having gear? I will answer—trust me. You would prefer to have a sharp knife rather than a dull one. And I’m not only talking about knives—hatchets, multitools, axes—all of them are dealing with blades.
Thus, if you care about being prepared for surviving, you would prefer to have enough bladed tools and weapons of different shapes—be it a cone shape or rectangular shape. You can even learn how to make stone tools from natural materials—all you have to do is master the art of flint knapping. In other words, learn some flint knapping techniques.
Today I will show you the world of flint knapping, and we will delve into some details of this practice.
Safety Advice For Beginners in Flint Knapping
But, do not worry! I’m here just to show you the right path.

First of all, make sure that your legs (thighs especially) are covered with reliable material. For that—consider having a leather pad. It should rather be a thick pad—otherwise, your body will not be protected from being scratched and sliced up. You can also use a thick blanket if the pad is not an option for you for some reason.
Second of all, buy special safety glasses, to make sure your eyes are protected as well. These safety glasses are not very expensive but will help you remain sighted.

Leather—is a great material to stay safe during flint knapping. That is why I would advise you to get leather work gloves not to let your arms be damaged during the working process. But gloves and safety glasses are not the only items of clothing you should wear while flint knapping. Make sure you also put on reliable shoes and pants.
Since you will produce the flakes, and they will hardly be under your control, I would recommend getting some special material, like a canvas tarp, so you could easily collect all the flakes when you finish your work.

As I mentioned, flakes will be everywhere, so you will definitely need to choose a reliable working space with appropriate ventilation. Or, you can simply buy a durable fan that will serve ventilation purposes. This aspect really matters because if you inhale too many flakes, it will damage your lungs—you may even get silicosis. You definitely don’t want this to happen.
If you want to be fully prepared for knapping, you should watch this video from a professional.
Tap here so that you could get a free copy of the Survival Gear Checklist.
History Of Flint Knapping
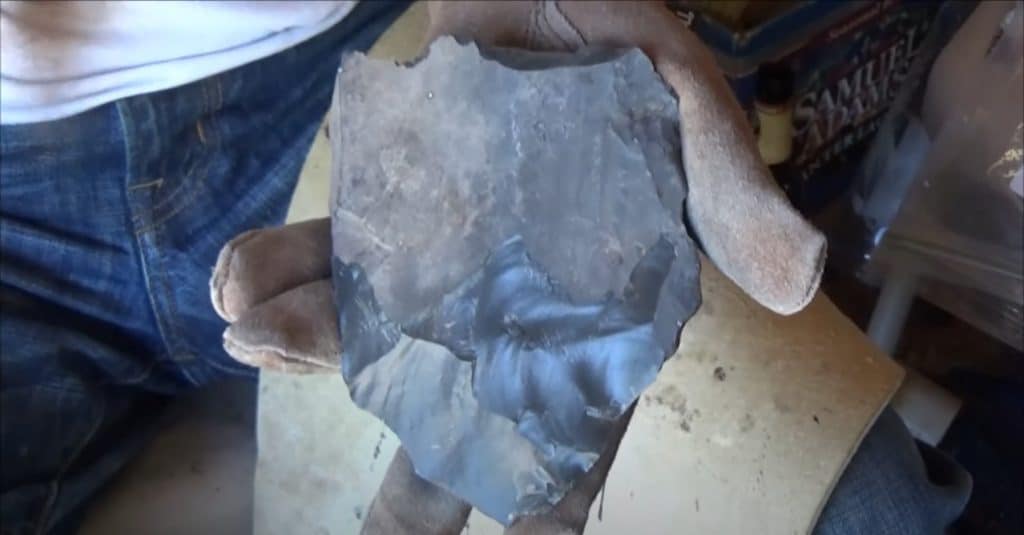
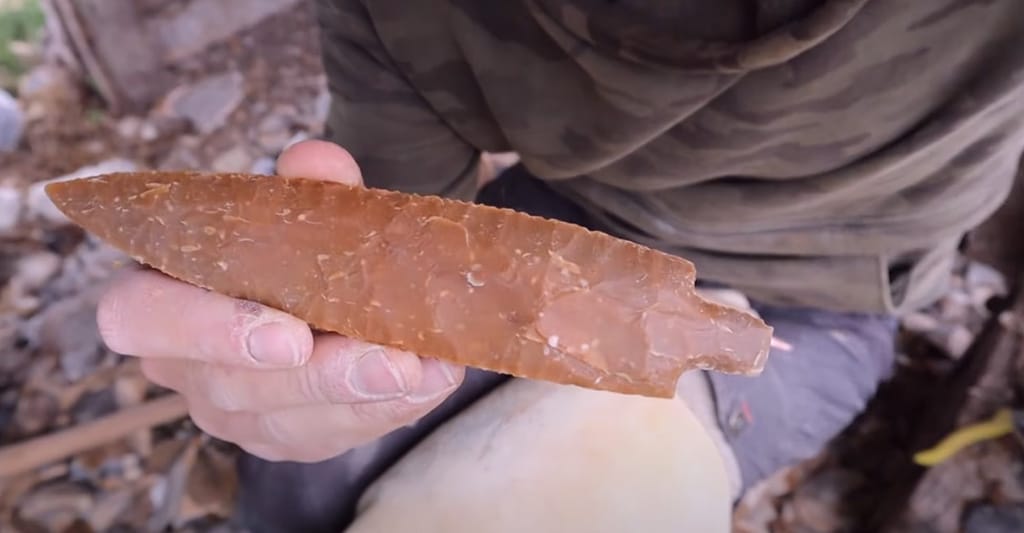
The first units of flintknapping art refer to thousands of years ago. People, developing their wilderness skills, started to create stone tools and blades to hunt and protect themselves. The first items looked very different from those we can observe nowadays. For example, take a look at this picture:
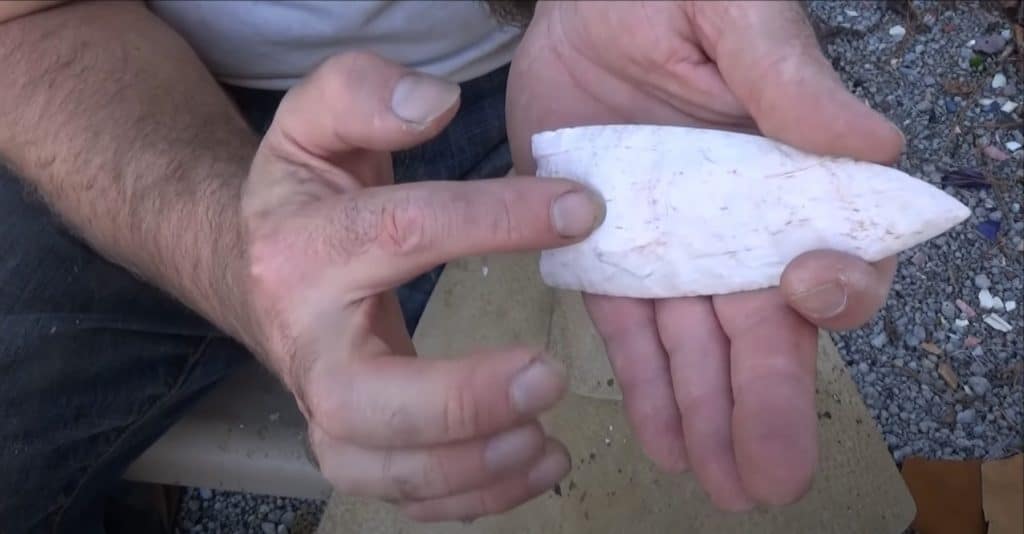
What do you see?
Yes, it is an arrowhead. This was the usual shape of the first stone tools people knapped. Pay attention—the metal was not available for humans of that period, so all the items were made from stone.
And we still call knapping an art because it requires a skill you have to master. Our predecessors worked hard to make their skills perfect—they invented their own techniques of knapping. Nowadays, we don’t use all of the practices which were popular during those times. But some—we do.
Archeologists can trace the ways people crafted the stones during excavations. The artifacts scientists found allowed them to obtain some understanding of how ancient people made their stone tools.
If you are interested in more historical details connected with the knapping process, watch the video below!
Here you can get a free copy of the Survival Gear Checklist.
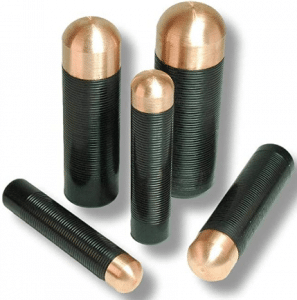
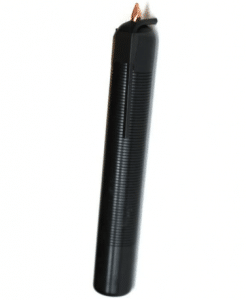
Use The Tools
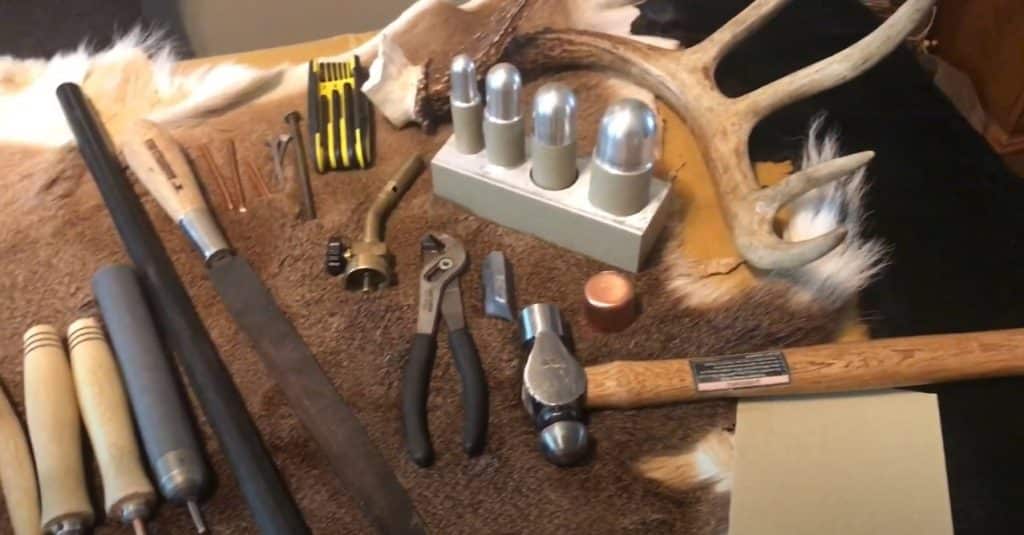
If we talk about percussion flaking, the best options will be a hammerstone (usually created from the river stones, as the water flow shaped them properly), a copper billet (it looks like a cylinder from any material—stone or antler might fit as well), or an antler.
You can try creating tools from the wood but be prepared that they are not as strong, reliable, and long-lasting as those I’ve mentioned above.
Watch this video for a deeper understanding:
Earlier I also mentioned the antler as a possible material to use. That is true—you can either buy the item or find it by yourself if you are a hunter.

Watch this video to learn more about what to do with an antler.
First of all, I’m talking about the sharp end of the deer antler. But, feel free to choose any other material—be it wood or plastic. You can even get some removable points.
Now you can learn more about creating personal pressure flaking tools.
And, finally, some more instructions about how to deal with the antlers:
Here you can get a free copy of the Survival Gear Checklist.
Which Stones To Choose?
However, if you “overdo” and take a too hard one, you are most likely just to destroy your tools without getting any result at all. So, think carefully when picking up a stone. Neither sandstone nor granite would meet your expectations. What should you choose then?
There is a list of great materials that will suit you perfectly. Among these are:
- Flint
- Chert
- Agate
- Jasper
They are somewhere in between the “soft” and “hard” ends of the spectrum. They will not break your knapping tools. And they will not break down themselves either. You will be able to shape flint or chert rocks the way you want, leaving and deleting the pieces you need. Also, they are durable enough not to get blunted after the first usage.
For sure, there are a lot of things that deserve to be discussed when it comes to stones for knapping. In this video, you can get some additional information about the natural stones you can use.
One more video, so you could learn more about “flint hunting.” Be ready: the amount of chert differs from region to region!
Materials
Now we can move some extra-materials you can use for knapping. Here they are:
- Obsidian
Obsidian is a naturally “born” volcanic glass, which is hard but amorphous, which makes it to be a great candidate for knapping procedures. Be careful—it is sharp, so you will definitely get several scratches when you first try. If this doesn’t scare you—be ready that you will break one sample after another, as these rocks require experience and dedication. But if you overcome this obstacle too, you will be rewarded! Obsidian provides wonderful scalper-like edges, sharper than almost any other material.
But, these edges are pretty fragile. You will have to work carefully with them. (Personal advice: do not try to use obsidian tools when it comes to working with bones. It’s not worth it.)
Watch this video to know more about dealing with obsidian.
- Glass/Porcelain
Luckily, these materials are easy to get. I’m sure you even have some old pieces of glass or porcelain at home. Every object that you don’t use any longer will fit—even the toilet. Every, I mean.
These materials are also great in the sense that you will get some additional practice in shaping, which will be helpful when knapping rocks.
In this video, you find some instructions on what to do if you have some empty glass bottles you don’t need:
Remember I mentioned the toilet? Don’t think I was joking—watch this video and learn how to “transform” it into the arrowheads.
Here you can get a free copy of the Survival Gear Checklist.
Knapping Instructions For Newcomers
If you manage to find an instructor, creating stone tools will be much easier and interesting.
If you don’t know where to start—try looking for local rock clubs. You can find them almost in every state of the USA. There you will find flintknappers who share your interests and get some help if you are lost and do not know where to start. Besides, sometimes there are special workshops and classes, where you will learn the art of flint knapping with professional knappers.
Check this link to learn more useful information about rock clubs and the facilities they provide. On the site, you can also search for details of events that you can attend and ask flintknappers who are “in the field” all the questions you have.
But attending these meetings is not the only option. You can also buy some reliable books devoted to flintknapping and creating stone tools. If you display real interest, these books are easy to read and are full of useful information about where to start and what to do next.
Click on any of the books’ images and get some more information on where to get them.
Here you can get a free copy of the Survival Gear Checklist.
Basics of Art of Flint Knapping
If you were an archeologist, you would know the term “lithic reduction.” This refers to changing the shape of the original rock to transform it into any sort of weapon. This is what actually “knapping” means.
Now tell me, have you ever heard about the so-called “conchoidal fracture“? If you have not, I provide the link so you could get the new information. Briefly, this pattern defines how the stone will break if we manipulate it if it does not have any separation planes. So, you are the one who decides which form it will take when you affect it.
If you apply enough force, you can spread any pattern around the stone—be it a curve or a concave.
Look what you can get working with obsidian materials.
When you change the force, you apply and the angle, you change the results you receive. These moves define the way the fracture of your stone will go. This practice gives you control over the material you work with.
The more you try—the more experience you get. The more experienced you are—the easier this process of formation is for you.
I suggest you get acquainted with the following video: it will bring you a deeper understanding of the nature of the conchoidal fracture.
Actually, it is in your power to change the knapping quality of materials you are working with. To do so, apply the heat treatment. Heat treatment is a practice of warming up the stone, thus increasing its knapping quality—the stone becomes smoother, more amenable to change. This procedure better works with the small stones, as the larger samples are more difficult to warm up. But, please, be careful when working with the fire!
Here you can get a free copy of the Survival Gear Checklist.
Knapping Techniques You Have To Know
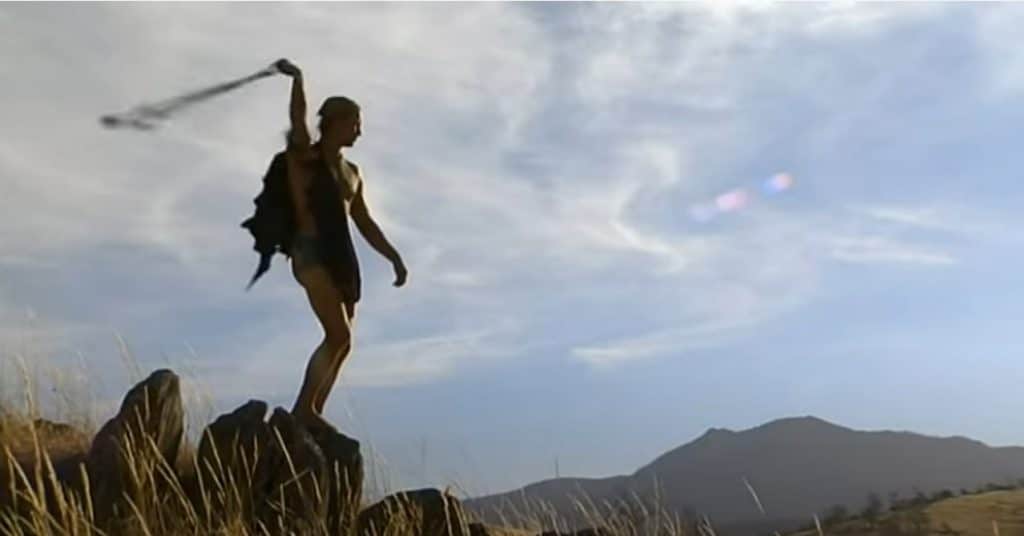
Percussion Flaking
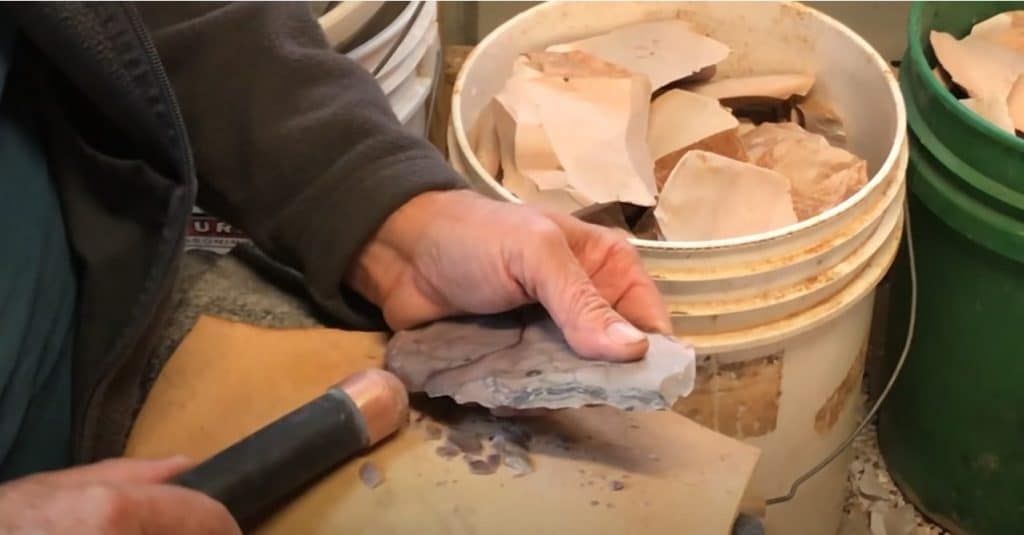
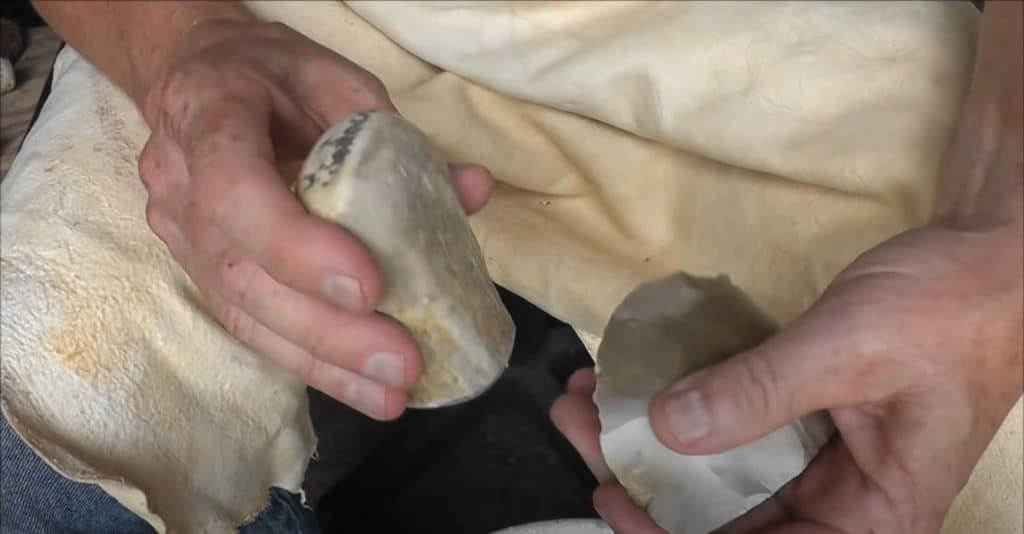
Percussion flaking is the method of flint knapping professionals use to start their work with the stone. It helps to process the material, removing unwanted pieces initially. To do so, you will need a strong, reliable tool, like hammerstone, for example. Use it to hit the rock and break off large fragments.
Advice: move to the pressure flaking only when prepared your stone with the percussion flaking!
There are 2 main “ways” of percussion flaking: direct percussion flaking and indirect one. In the videos above, you had a chance to see how to direct percussion flaking works. Basically, the main idea of direct flaking is that you apply your tools (hammers, for example) directly to change the shape of your future stone tools during the flint knapping process.
Indirect practice differs. In the art of flint knapping, when you use an indirect technique, you first set a “holder” (be it any special tool or your leg, for example). You put another tool (let’s call it “tool X”) in this holder, and after that, this “tool X” directly touches the rock you are flint knapping, while the tool you hold (let it be “tool Y”) in your hand does not. You use “tool Y” to hit the “tool X” so that “tool X” transformed the shape of your rock.
Don’t worry if you did not get everything. You can learn more about indirect flaking from the video below.
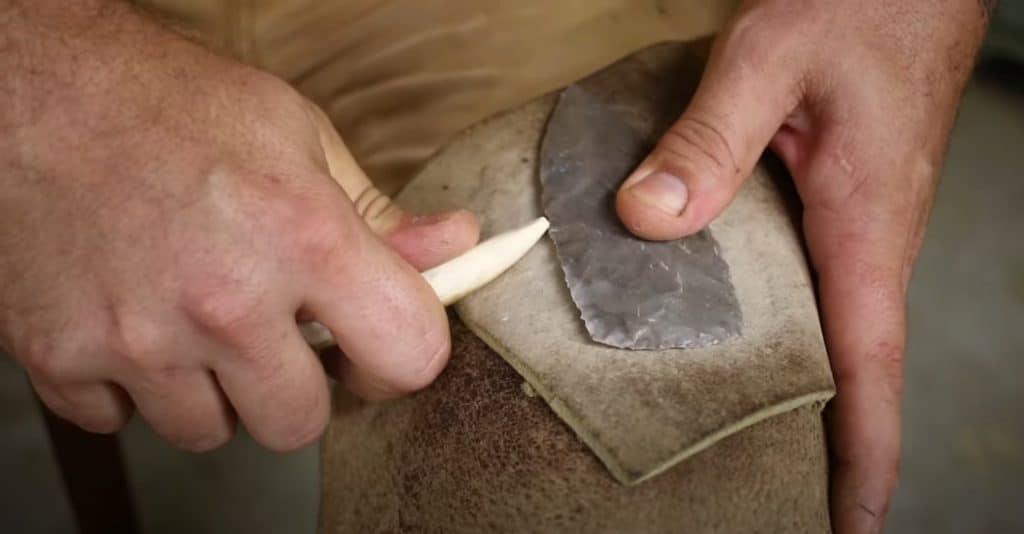
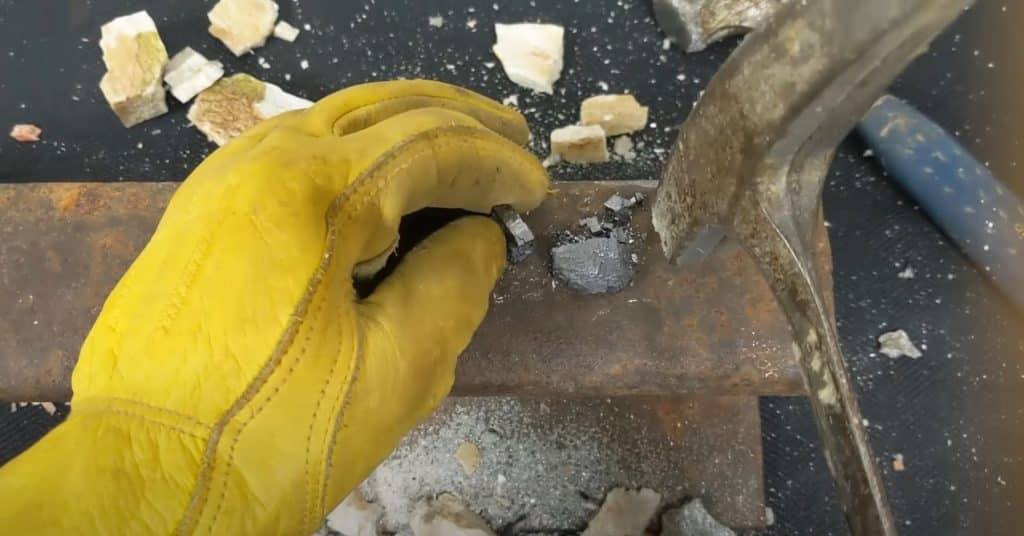
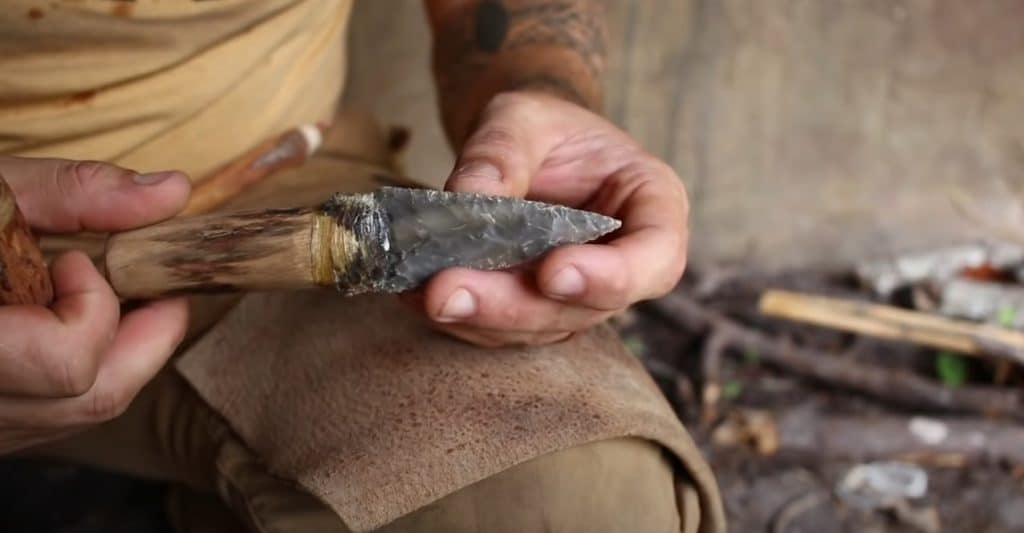
Pressure Flaking
Once you are finished with percussion, you can move to the pressure flaking.
Pressure flaking is a flint knapping method when you change the form of a stone directly, using a fine-point tool. This is considered to be a more delicate operation, as the roughest part of work is left behind.
Get ready—this “pressure flaking” part of your knapping path is going to be slow. You will work with the edges of your future tool, making notches you need. There is a positive side of this moment, too—pressure flaking does not produce huge flakes in a great amount!
But, despite this fact, please, still be careful—flint knapping with a rock, wear safety glasses, special clothes, and shoes!
Watch this video to learn more about the process of pressure flaking:
Here you can get a free copy of the Survival Gear Checklist.
Stone Tools You Can Create
First of all, they had to hunt (sometimes on long distances), for that they needed arrows (arrowheads) and bows. Then, they had to skin animals to stay at warmth. Also, they removed bark from branches to use it later. To manage all of this, they needed dozens of different knives and blades.
This video will show you how to create a simple but useful arrowhead out of a rock:
See? You don’t have to create just one arrowhead from big stones. Flint knappers can get two or even three arrowheads. It all will depend on the size of your stones and the size of an arrowhead you what to eventually create. Use your tool to check!
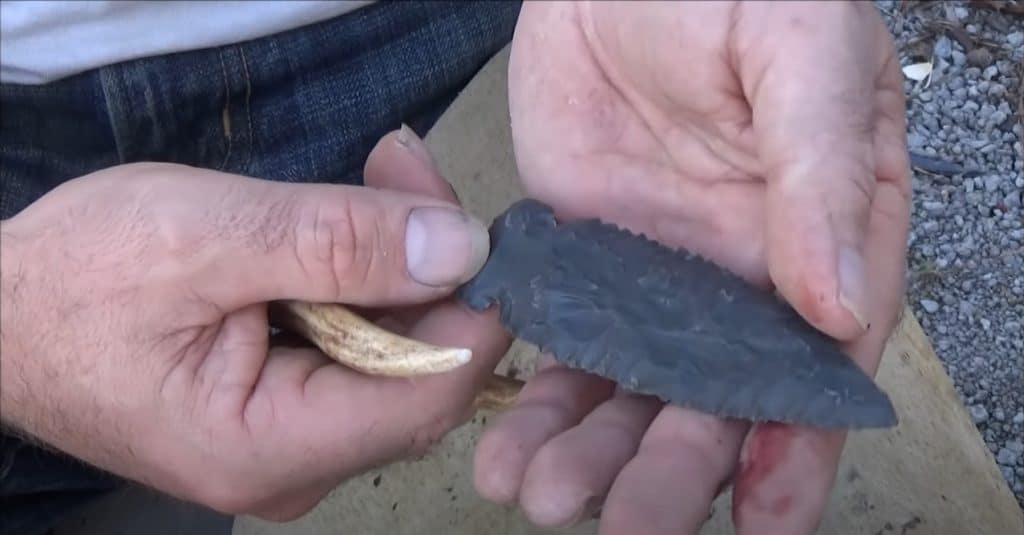
They even created combined stone tools from smaller tools so that their parts were interchangeable. This allowed not to throw the entire weapon away when one part of it was not applicable for the work any longer.
An example of such a combined stone tool you can see in the picture below.
You will be surprised, but our predecessors were even able to make simple drills from the stones! They served to make holes in different materials—even in the other stones.
Watch this video to see how it functions!
Here you can get a free copy of the Survival Gear Checklist.
Flint Knapping And Surviving
Forewarned means armed. What does it mean? It means that now you can try to create your personal stone tools using the material at hand. Every true survivalist in any country strives to learn how to flint knap because it makes him confident about his future. Knappers know for sure that in case of emergency, they will know what to do to make some basic stone tools for basic needs.
Of course, you don’t have to throw away the tools you have already. I would not let anyone take my newly-bought survival knives from me! But knowledge of how to do my own stone tools makes me feel more self-reliant and confident, and I appreciate this feeling a lot.
If you consider yourself to be a survivalist and want to be proud of your wilderness skills, developing the skill of flintknapping will always be advantageous. Think of it and join the knappers’ club!
FAQ
Where can I find flint for knapping?
Flint, or chert, or any other rock material, which you can potentially use for knapping, can be obtained in different places. First, you can ask at your local stone quarries. Second, try checking next to the water (stream especially). Or, you can simply buy as much as you need at the rock shop. To get more information about flint and other possible materials, check the “Which Stones To Choose” section of this article!
What is a flint point?
A flint point is a stone tool, usually sharp, which you can receive as a result of your flintknapping. Our predecessors used them as a weapon, a part of an arrow (arrowhead), which helped them hunt and protect themselves. Archeologists state that the first prototypes of these flint points were found in Virginia. But since flint used to be not such an “easy-to-get” material, our ancestors also used wood and bones to create tools.
How to pressure flake?
Pressure flaking is one of the two main techniques of flint knapping. The section “Techniques You Have To Know” introduces it. Briefly, a knapper, using a strong point (from antler tine, for example), presses the edge of the stone where he wants to eliminate the unwanted flakes. The more force he applies, the more pressure increases, and the more flakes he can remove if the work is done properly. The size of flakes produced by pressure flaking is usually smaller than the size of those generated by percussion flaking. This is usually the first step knappers make when they process a stone.
How to break flint rock?
Before you start flintknapping, you should put the stone through its initial processing—that is, begin with percussion flaking. More details you can get if you read the “Techniques You Have To Know” section. Briefly, you use one flintstone to hit another stone, applying some force with the purpose of changing its initial form and removing unwanted pieces, which are usually bigger than those you deal with in the process of pressure flaking.