Having an ultralight tarp shelter in your backpack, especially in 2023, can actually save your life in multiple outdoor situations, from simple hiking or camping trips to those when actual survival in the woods is required. In addition, lightweight solutions are the best friends of minimalist backpackers, which most of us are when it comes to survival gear.
TOP Best Tarp Shelters That you Would Want to Buy
Depending on its size, it can cost either around 200 dollars for one person or around 220 dollars for two of them.
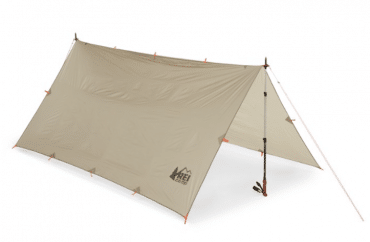
The material is made out of silnylon and the waterproof tarp itself has eight decent tie-outs, cord adjusters, and guy lines that go together with the shelter itself. This tarp could definitely be one of the best tarps on the current market.
The price of the waterproof tarp is somewhere around 180 dollars, and this one is capable of fitting two people. You could also buy a mesh house from this company that would perfectly match the construction of a tarp and protects you from any insects as well.
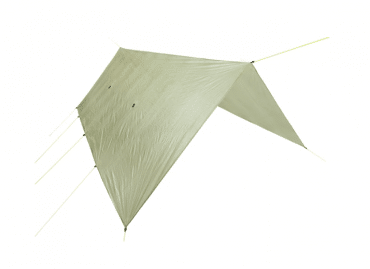
What makes it different from others is the form that has a square shape which allows you to make quite a lot of different tarp frames, such as an A-frame or C-Fly wedge.
The price is about 150 dollars for a waterproof tarp that would fit 2 people at the same time.
To find something better is to spend enormous amounts of money for such a product, but Zpacks Flat Tarp costs only 275 dollars for a 2-person shelter, so you better buy this one before it would be out of stock again!
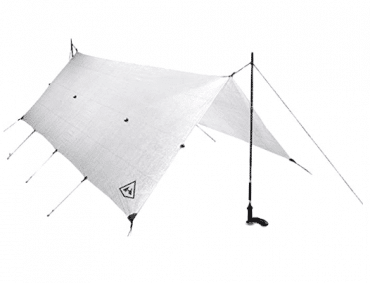
There are also 16 tie-outs on this tarp, but its price, as we have already mentioned, is higher: 355 dollars for a 2-person escapist tarp.
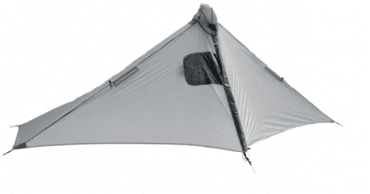
What is interesting about this escapist tarp is the fact that it could be used as a rain jacket when a tarp shelter is not needed, which means that you would be solving two troubles with the help of just one product! The only downside is the size of this tarp which would not have enough space for two or more people at the same time.
The weight of this waterproof tarp is only 9 ounces and the cost of a one-person tarp is equal to 110 dollars, which is not the worst solution on the current market. The tarp is available in two different materials: either silynylon or Dyneema, with the last one being more expensive but, at the same time, twice as lighter.
If a two-person tarp is needed, this company also makes them, which means that you would be able to find yourself the best tarp using whatever preferences and possibilities that you have!
The price is also quite generous, as you would only have to pay about 125 dollars for a one-person tarp.
What is a tarp shelter anyway?
There are usually four possible cases when people would need a tarp shelter, such as the following ones:
- As for hiking or camping tarps.
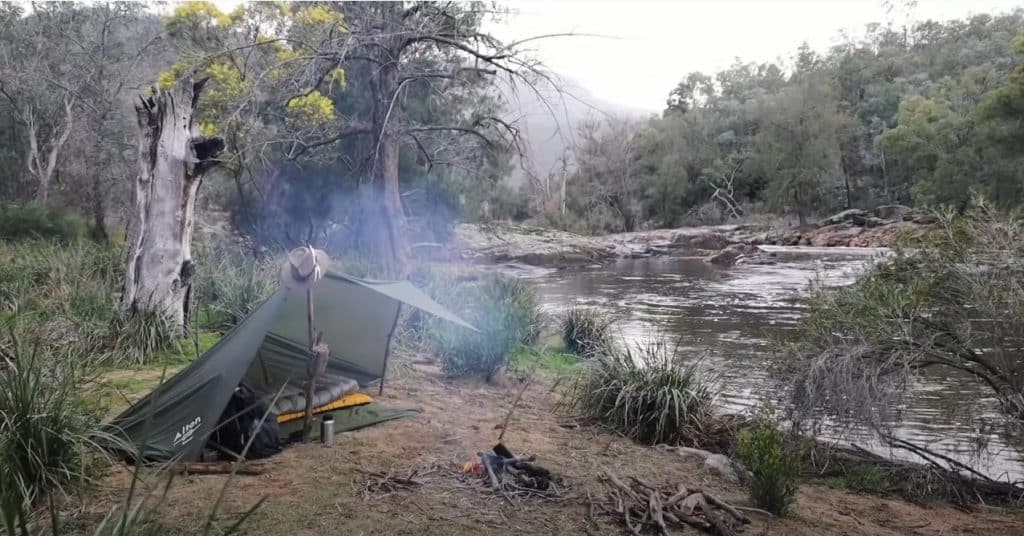
If you are an active person that loves to spend some time on an outdoor adventure, having a tarp shelter is a must-have, especially if you plan to do some long hikes, as tarp shelters are the most lightweight product that you could find for yourself. - As a protection for hammock lovers.
If you prefer to sleep in a hammock then you would also need to get yourself a tarp shelter that would defend you from high winds and rain. You could even find some tarps being sold together with a hammock. - As a Plan B.
For some people, it is crucial to have some backup on their trips, so they would also buy a camping tarp as it does not take much of the space in your backpack and can be easily used if needed. - As a survival shelter.
Tarp shelter could be also used in case of emergencies, and you will be especially lucky if you buy it before any of such situations, as otherwise, you might not be able to find them in the shops and will end up with some very heavy survival gear and a shelter instead of an ultralight tarp one that does not take as much space and would allow you to take some other important things with you as well.
In this article, we are going to tell you about different important criteria for your tarp shelter and their types, as well as about the pros and cons of such shelters, so that you could make an informed decision about these ones.
Pros and Cons of Camping Tarps
Here you can learn about them and make up your mind about buying an ultralight tarp for your possible shelter. Just make sure that the pros outweigh the cons specifically for you.
Pros
- The most lightweight shelter that you could possibly create for yourself in survival conditions;
- It costs much less than a tent;
- Has lots of different sizes, forms, and ways to secure them in your outdoor adventure;
- Provides you with access to the fresh air, as most tarps allow for the air to circulate freely inside of them;
- Does not block you from the spectacular views of the nature;
- Can be placed in quite different forms, so that you could even cook under them when needed.
Cons
As for the tarp cons:
- When not having enough experience with placing an ultralight tarp shelter somewhere outside of your house, you most probably will end up with such a configuration that will not defend you from rain or wind;
- The stability of an ultralight tarp setup is not as decent as the one of a tent;
- Will not defend you from animals or bugs, for that you will need an additional mesh tent to be placed inside of your tarp setup;
- It is more difficult to place a tarp and it is not convenient to be used for those that never had any experience with them.
Learn how to set up a Tarp Shelter
At the bare minimum tarp shelter configurations, you will need to following things to be able to set it up:
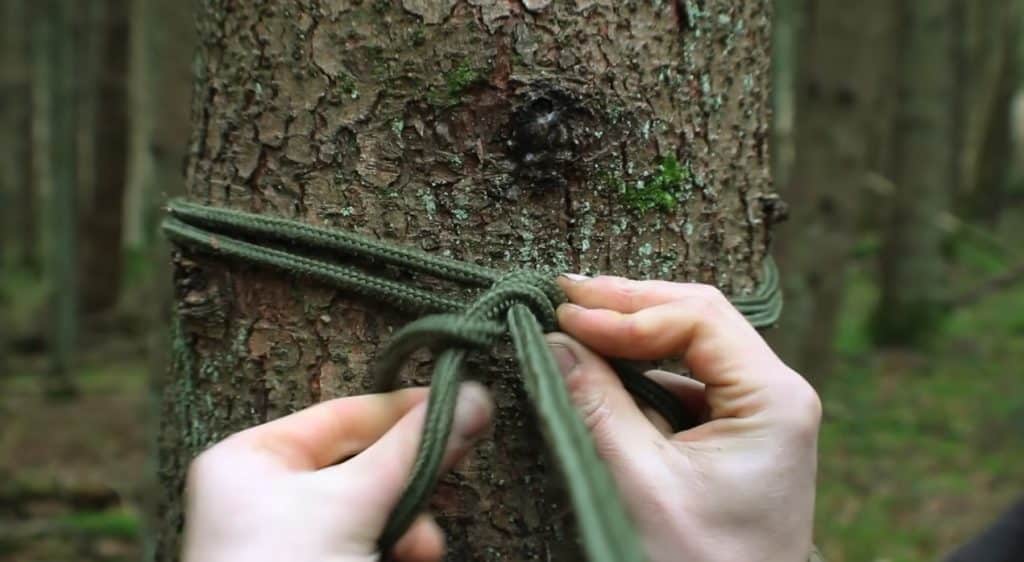
- Control points. Out in the wild, you will need at least two trees placed conveniently for you to use to support your camping tarp. If they are not present, hiking poles could also work for these purposes when placed correctly.
- Paracord will also be needed to secure the ridgelines of your camping tarp construction.
- Rocks or anything else that is heavy enough to make sure that the lines will stay put on the ground.
It is also crucial that you know different configurations of knot tying that can be applicable for different situations, so you might also want to update your knowledge here or simply make your hands remember how to do them.
Here is the list of the most convenient knots that are easy to tie and untie, as well as keep the tensions of your tarp shelter configurations decent:
- For guy lines you would want to use a taut-line hitch, as it is easy to adjust yet you can rely on it not to slip out from the ground.
- To achieve decent tension in your tarp shelter configurations you might want to remember how to make a Trucker’s hitch. This one is especially useful as you will be able to adjust the tension of your tie while securing a ridgeline.
- If you are going to attach your camping tarp to some trees, learn how to tie an Adjustable Prusik knot.
- For anchors, you will want to use a Bowline knot tying, as it will create a fixed loop at its end.
101 on a Tarp as a Good Shelter
Now, we will go through these important characteristics first, and then also discuss different tarp shelter configurations that you could create from it.
Criteria to Take Into Account
We believe that there are four important things that you should remember when choosing the perfect tarp shelter for yourself, such as the size, amount of tie-outs, weight, fabric, and shape.
-
The Amount of Tie-outs
The basic amount of tie-outs that any tarp should have would be equal to four so that there would be one on each of the corners of your shelter so that your guy lines and trekking poles could be secured. The more tie-outs your tarp will have, the better stability the structure will have and the bigger amount of options to set up your tent shelter will be provided to you.
Thus, it is always better to have a larger amount of tie-outs, as this will mean that you will have more protection in different kinds of situations.
-
Size
The ideal size for a good shelter that could fit two people would be somewhere around eight by 10, and make sure that your tarp will be able to cover both of you decently, as well as live enough additional room underneath to place there some important things that you took with you, so that, for example, the wind or rain would not destroy them.
-
Weight
It is quite obvious that if you are choosing a camping tarp instead of a tent, you would want it to be lightweight, which is why you should look for options that would weigh less than 1lb. You could always compare its weight in the shop with a tent that weighs 2lb or more and then imagine wearing it as part of your baggage for long distances and then having to set it up.
-
Shapes
The most convenient and popular tent shapes that you could find on the current market are rectangular, hexagonal, and diamond-shaped ones. All of them have their own pros and cons so that you can find the best camping tent for yourself for different kinds of conditions and preferences.
Here is a bit of description for each one of them:
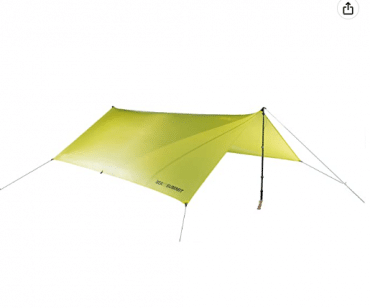
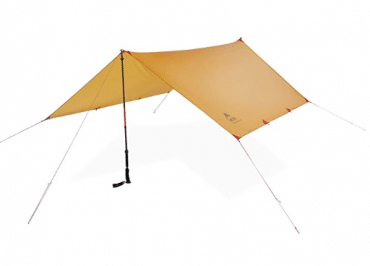
- A rectangle-shaped camping tent is the most common shape that you will find on the market. The amount of tie-outs on each side is usually equal to three. The size of such tarps is a bit bigger, but this might be the most versatile tarp that you could buy: it will allow you to make lots of different tarp configurations so that you can get as much protection as possible.
- A diamond tarp setup is in the form of a square tarp that is usually placed diagonally on the ridgeline and has one tie-out for each side. As you could guess, this type of tarp does not provide you with the same level of protection that a rectangle one does, but it is not made to do so. The diamond tarp setup is perfect for warm weather conditions in the summer when you would like to get as much fresh air as possible. It is the perfect solution that could be used to cover your hammock.
- The hexagonal tarp shelter is the last one that we are going to discuss right now, but definitely not the least. This is something in between the other two shapes of tarps that we had already described: it is more lightweight than a rectangle tarp, and it gives you more protection than a diamond-shaped tarp does, but less than that of a rectangle one. As for the number of tie-outs that are needed for this type of tarp, it should be equal to two for each side.
Tarp setups
The amount of configurations that you could make with the help of your tarp is enormous, so we will only discuss ten of them here because it is highly doubtful that you would need to look at more of the options: these ones will provide you with all the necessary choices that could be used in different conditions.
-
The Low-profiled one: Stealth Tarp

However, this option will not cover you from all sides, which is why a mesh tarp is needed to protect you from insects. As for the rain or wind, you just need to make sure that those sides that are covered will be the ones taking the hit so that you could still stay warm.
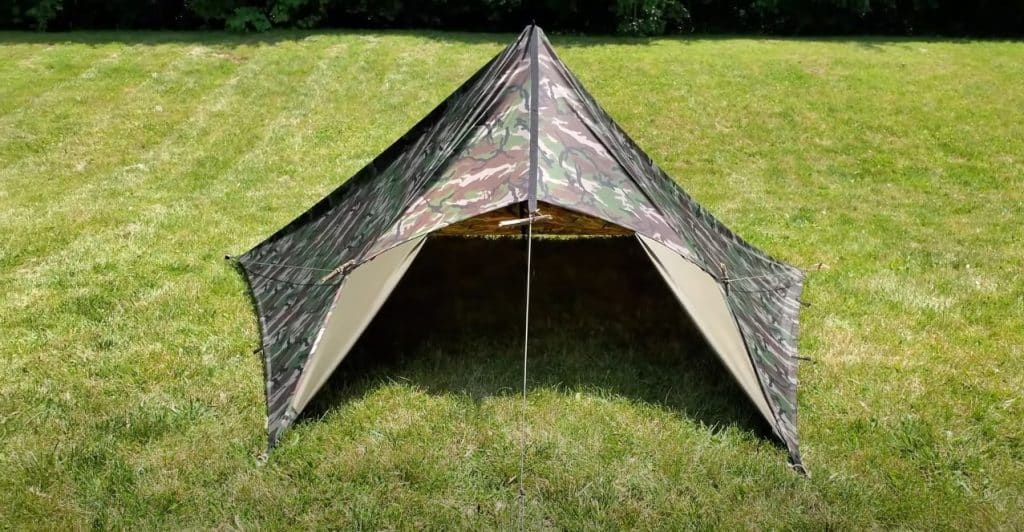
-
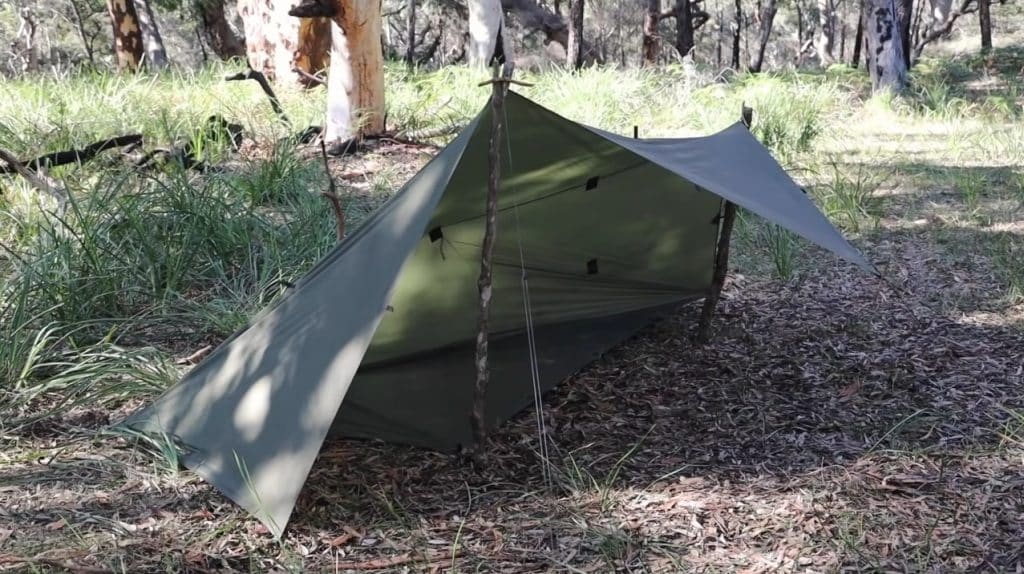
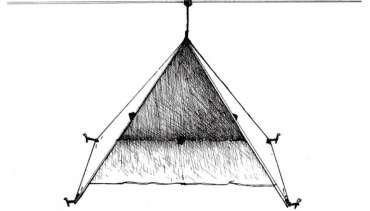
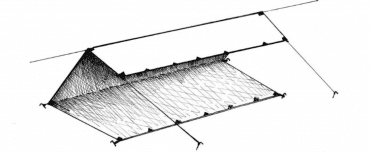
The Classical one: A-Frame Tarp
There is no better way to extend the size of your tent other than by making an A-frame out of it: this configuration would allow you to put more than two people under the tarp together with their belongings. It would also provide you with decent protection from wind and rain.
-
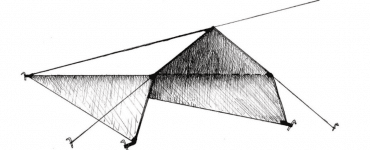
The In-Between-one: Tipi Tarp
The last point also means that as there is some fresh air reaching you inside the tarp, you will not receive 100 percent protection from different insects.
So how this tarp is designed: you will need a ridgeline that should be put through a tie-out, and some stakes to be put on the rest of the tie-outs to secure the whole construction.
-
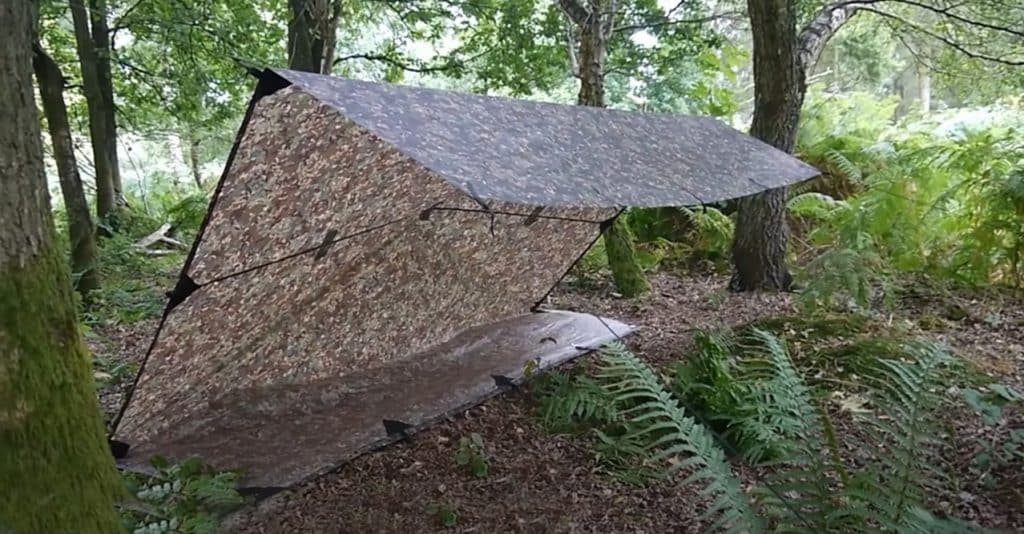
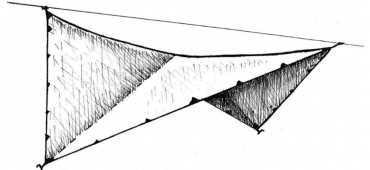
The Most Open one: the Lean-to Tarps

Because of that, this Lean-to tarp design might give you the biggest amount of fresh air, and thus, it can fit lots of people at the same time. It is also perfect when you need to make a fire or cook something, but only when there is no rain or high wind surrounding you.
-
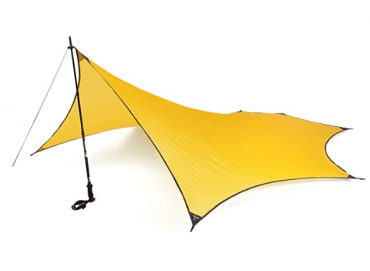
The Multifunctional one: Plow Point Tarps
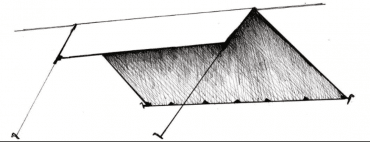
All that you would need to make such a configuration is a tree that will play the role of attachment points and a few guy lines or trekking poles to secure the tie-outs on the ground.
The upper part of such a shelter is quite vulnerable to different weather conditions, but as this configuration has a very quick setup, you could easily readjust attachment points to another angle, so that rain or wind would not catch you.
-
The one for a Hammock: the Diamond Tarps
All that you would need to do to configure this type of frame shelter is a ridgeline placed through the two of the tie-outs and guy lines, one for each side of the tarp to place the configuration securely over the hammock.
As for the protection, you could be quite sure that no rain or wind would come in your way under such a shelter so that you could sleep comfortably underneath it.
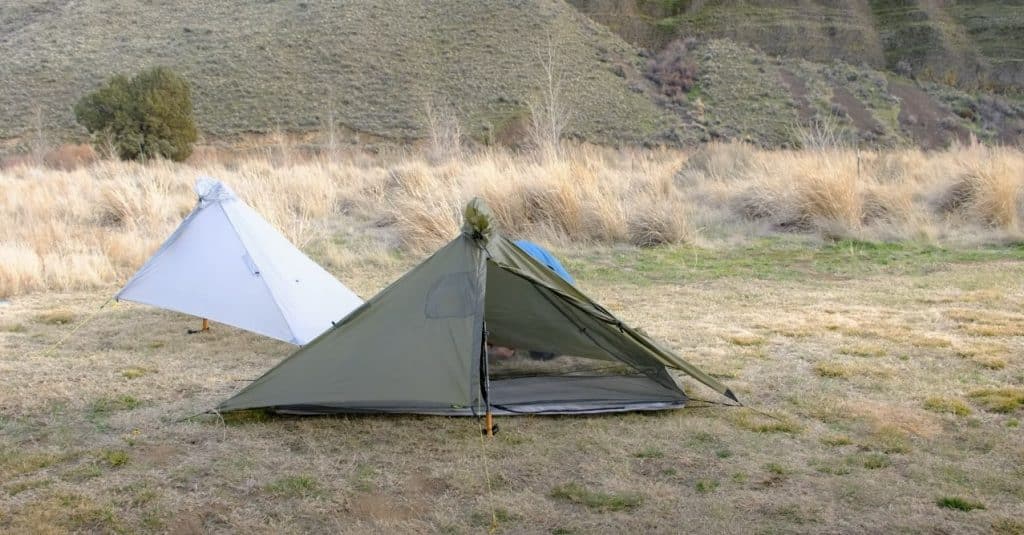
-
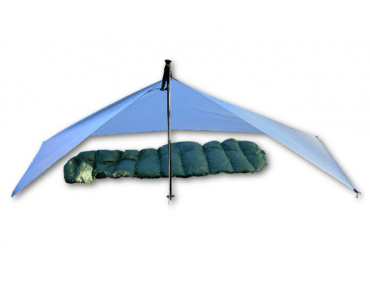
The Pyramid-like one: Mini-Mid

Mini-mid is a smaller variant of usual pyramid construction that can be up to 5 feet tall, and there is definitely nothing hard about making such a shelter: all that you would need is one of your trekking poles placed on the center of your construction so that the material would simply extend to the ground from all four of its sides and secured with the help of some guy lines.
As for the amount of space present inside the construction, you can rest assured that up to three people could be placed there.
-
Additional Configurations to Consider
 There are three more setups that you could create with the help of your tarp, but they are not as commonly used as the ones that we have already described, so you could read this part if something particular is needed for your situation, or if you are just curious about various configurations that could be made.
For example, you could set up something like a tarp tent, as it is the most convenient solution when you do not have a ridge line to be used. Instead, you will place the center pole (like some trekking poles) as the supportive mechanism of your tarp tent and the tie-outs on the land secured with guy lines, for example. However, be careful with this choice, as it will reduce a lot of free space inside the tarp and it is definitely not the easiest way to configure your tarp.
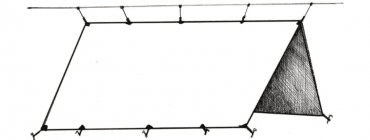
In addition, you could also try to make a Half cone fly configuration of your tarp.
To be able to set it up, you would need the following things:
- A ridgeline placed from one tree to another, so that the front part of your shelter would be situated above the ground;
- A stake to make sure that the back of your tarp would stay on the ground cover;
- Lots of guy lines to stretch the construction;
- Stakes to lower the tarp’s position to the ground.
This easy setup will definitely be able to protect you from different weather conditions, but it would not give you a lot of space inside of it.
With these C-Fly camping tarps, you will have a chance to receive lots of fresh air from one side, while being protected from wind and rain on the other.
Frequently Asked Questions — FAQ
How To Set Up Camping Tarps Without The Cordage?
You could use a Y-shaped tree stick that would be placed with reliance on two trees and another two sticks to create an X-shape that would be supported by the first y-shaped stakes.
On top of this structure, you could easily lay your camping tarp and use little stakes for your tie-outs so that no cordage would be needed at all!
How to use a Tarp Pole?
You could use them for the general support of your waterproof tarp structure so that it would not rely on some trees or would be placed higher above the ground for your convenience. In the latter case, you would have an opportunity to cook or hang out with somebody under the camping tarp.
How to Pitch a Tarp Shelter?
There are many different configurations that you could use to create your own tarp shelter, and most of them are discussed in the article above.
Whatever you choose after reading it would depend only on your needs and capabilities.
How to Pitch a Tarp Canopy?
The easiest tarp setup that you could use is called A-frame, as it simply reminds us of the shape that the letter “A” has.
All that you would need is a ridgeline for the center of your configuration and a few stakes to secure the structure on the ground.
How to Build a Rain Shelter?
The best protection from the rain could be received from a tarp shelter built in the form of a pyramid: it would not leave any chances for the water to go inside of the tarp, as the setup would simply cover all of the sides with tarp material.
What is a Tarp Tent?
A tarp tent is basically a tarp material that is used to create different forms of tents to protect you from the weather.
The tarp is much more lightweight than a tent, which is why many people prefer the first one to the second.
How to Build a Tarp Tent?
To be able to create a tarp tent you would not need a ridgeline for that. Simply use the center pole as the supportive mechanism of your shelter and secure your tie-outs with the help of guylines.
However, please remember that such a configuration would not leave you a lot of free space inside of the shelter.